|
The complete guide to Krull - by Q.T.Quazar v 1.0, 09/08/2001 |
|||
|
Counting how many fireballs the Beast can shoot. Counting how many ricochets one of the Beast's fireballs can make. Trying to figure out the scoring rate for boulder dashing. How do army members die? multiple hits / limited amount of kills? Checking the exact hit detection area for Colwyn. Counting the exact time cycles for the Hexagon wall color changes. Checking how long it takes to recover your Glaive from a bad Hexagon hit. Come and check out my .inp for Krull at the MAME Action Replay Page (MARP) |
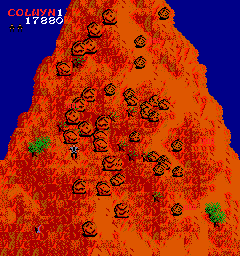
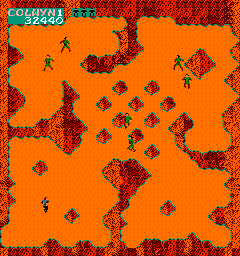
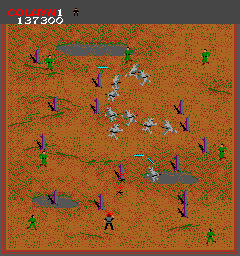
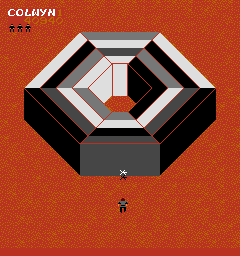
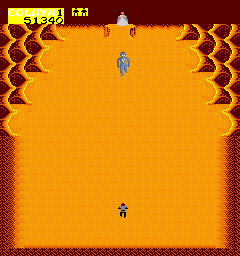
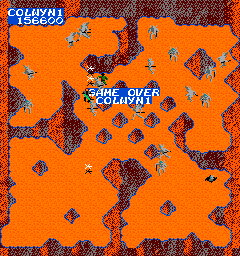
Krull is an arcade game based off the 1983 movie, which, as fantasy movies go, was actually pretty good. The game's plot is loosely based on sequences from the movie. In the game, you are Colwyn, heir to the throne, and you are trying to rescue your beloved, Princess Lyssa, from the evil Beast and his Slayers. Krull is essentially a souped-up version of Robotron, with the same dual-joystick control scheme. The game is divided into five rounds, the first one weaponless (thus requiring only one joystick), and the next four using one control for movement, and the other for firing your weapon. In case you were wondering, 'Krull' is the name of the fantasy world where all the action takes place. Stage 1 - Collect the pieces of your weapon -- the Glaive. The REAL boulder dash! The five pieces of the Glaive are spread out across a mountain top. You have to grab each blade piece while avoiding the boulders rolling down the mountain. Be cautious around the trees on the mountain--they will slow you down as you pass through, unless they have previously been crushed by a boulder. Oh, and no, you cannot fall off the mountain. :) Stage 2 - Rescue your army -- shoot the Slayers. You've recovered the Glaive; now it's time to build an army. Eight members of your army are scattered around a wasteland, and Slayers, nasty silver creatures that shoot electrical bolts, are popping up out of the ground everywhere. The Slayers are aptly named; they're equally happy killing you or your army mates. You can kill slayers by throwing your weapon at them. Your army members can also kill them by touching them, but will die if hit by a Slayer's bolt. Slayers can kill you by hitting you with a bolt or by touching you. Rescue as many army men as you can--when all are rescued or dead, you must kill the remaining Slayers on the board. Be forewarned, some Slayers will begin to move faster and faster if you do not kill them immediately. Furthermore, the final Slayer will always move and fire at maximum speed. There are various dead trees that can impede you (you cannot pass through them) on this level, but they're a relatively minor factor. Stage 3 - Lead your army to the Hexagon. You've recovered your army, now you need to lead them to the Hexagon (some form of transportation? it's been too long since I saw the movie) Essentially, this stage plays the same as the Rescue stage--except your army and Slayers do not kill each other. Collect army members by touching them and then touch the Hexagon that floats around the arena to deposit your army into the Hexagon. You must collect all of your army to advance to the next stage, but you DON'T have to kill the Slayers at the end of the stage. This stage may play the same as the Rescue stage, but it's much, much harder. The screen is divided into four 'pocket' areas in each of the four corners, which are connected by a small patterned maze of rock formations in the middle of the screen, making shooting only possible in the middle area on a diagonal axis. It's also hard to pull off long range shots, so running through the middle to get to another pocket is a harrying experience, and where you're most likely to die in Krull. You can collect as many men as you want before touching the Hexagon, but if you die before dropping those men off, then you have to collect them all over again on your next life. The Hexagon moves randomly around the area, and homes in on you when you get close (thankfully) Stage 4 - Break down the front wall of the Hexagon --when it is black. Your army is inside the Hexagon, and you're about to be attacked by Slayers. You need your army. The front of the Hexagon has four walls which will shift through different colors. When the wall turns black, you can destroy it. If you shoot through all four layers, you continue to the next stage (again, you won't have to kill all of the Slayers in this stage). If, however, you shoot the Hexagon wall when it is any color but black, your Glaive will stick to the wall and you will have one less Glaive for a number of seconds. All of this takes place while you are being attacked by Slayers, of course. Stage 5 - Rescue Princess Lyssa. Avoid the Beast. Avoid his fireballs. The endgame. The Beast starts in the middle of the screen, you start at the bottom, and Princess Lyssa is in a niche at the top. You need to get to the top. The Beast will be trying to stop you. The Beast throws fireballs at you which will rebound multiple times off of walls, making timing and aiming crucial in this stage. You can shoot down the fireballs with your Glaive, and you can stun the Beast by hitting him (he is always slowly moving towards you, throwing his fireballs). If you make it to Princess Lyssa, you chase away the Beast and score points for your surviving army members, before starting back at a harder, faster first Stage. Killing a Slayer (any Stage) - 100 points Collecting an army member (Stage 2) - 1000 points Depositing an army member at the Hexagon (Stage 3) - 1000 points Destroying Hexagon wall (Stage 4): 1st wall=1000 points, 2nd wall=2000 points, 3rd wall=3000 points, 4th wall=4000 points Destroying the Beast's fireball (stage 5) - 100 points Stunning the Beast (Stage 5) - 100 points Bonus for Surviving army members (Stage 5) - 1000 points per army member Stage 1 Stage 2 Stage 3 Stage 4 Stage 5
|
||
 You have 4 Glaives that can be on screen at once. If you've shot all 4, you have to wait for one to come back before you can fire again.